

Project Setup
Scaffold the SolidX Todo app against PostgreSQL and run it locally.
Prerequisites
Install these prerequisites before starting the tutorial:
- Docker Desktop or Docker Engine
- Node.js 22+
solidctl- Python 3.12+ if you plan to use the MCP flow, because the SolidX MCP server and agent runtime are Python-based
Install the SolidX CLI if it is not already available:
npm install -g @solidxai/solidctl@latestVerify the environment:
docker --version
node --version
solidctl --version
python --version
References:
Set Up the Project
On this page, you will start PostgreSQL, scaffold the Todo app against that database, install the SolidX MCP connection into your agent, and then start the generated backend and admin UI locally.
By the end of this setup flow, you should be ready to generate the Todo module through your MCP-capable agent.
Outcome
At the end of this page, you should have:
- PostgreSQL running in Docker
- a scaffolded
todo-appproject - the SolidX admin UI running on
http://localhost:3001 - the API and Swagger docs running on port
3000 - the SolidX MCP connection installed in your agent
Start PostgreSQL in Docker
This tutorial uses an external PostgreSQL container:
docker run -d \
  --name SolidX_DB \
  -e POSTGRES_USER=solidx_app_user \
  -e POSTGRES_PASSWORD=strongpassword \
  -e POSTGRES_DB=solidx_app_db \
  -p 5432:5432 \
  -v solidx_pgdata:/var/lib/postgresql/data \
  postgres:17
These values are fine for local tutorial use. Change them for any real environment.
Wait until PostgreSQL is ready before scaffolding the app:
docker exec SolidX_DB pg_isready -U solidx_app_user -d solidx_app_dbContinue only when the command reports that PostgreSQL is accepting connections.
If Docker setup fails
- If Docker reports that
SolidX_DBalready exists, start the existing container withdocker start SolidX_DB, then run the readiness check above. - If port
5432is already in use, stop the other PostgreSQL service or change the Docker mapping to an available port, such as-p 5433:5432. Use that same host port whensolidctl create-appasks for the database port.
Scaffold the App
Recommended order
Start PostgreSQL first, then run solidctl create-app, then run solidctl mcp install from the generated project, and only after that start the app with solidctl start:dev.
Run:
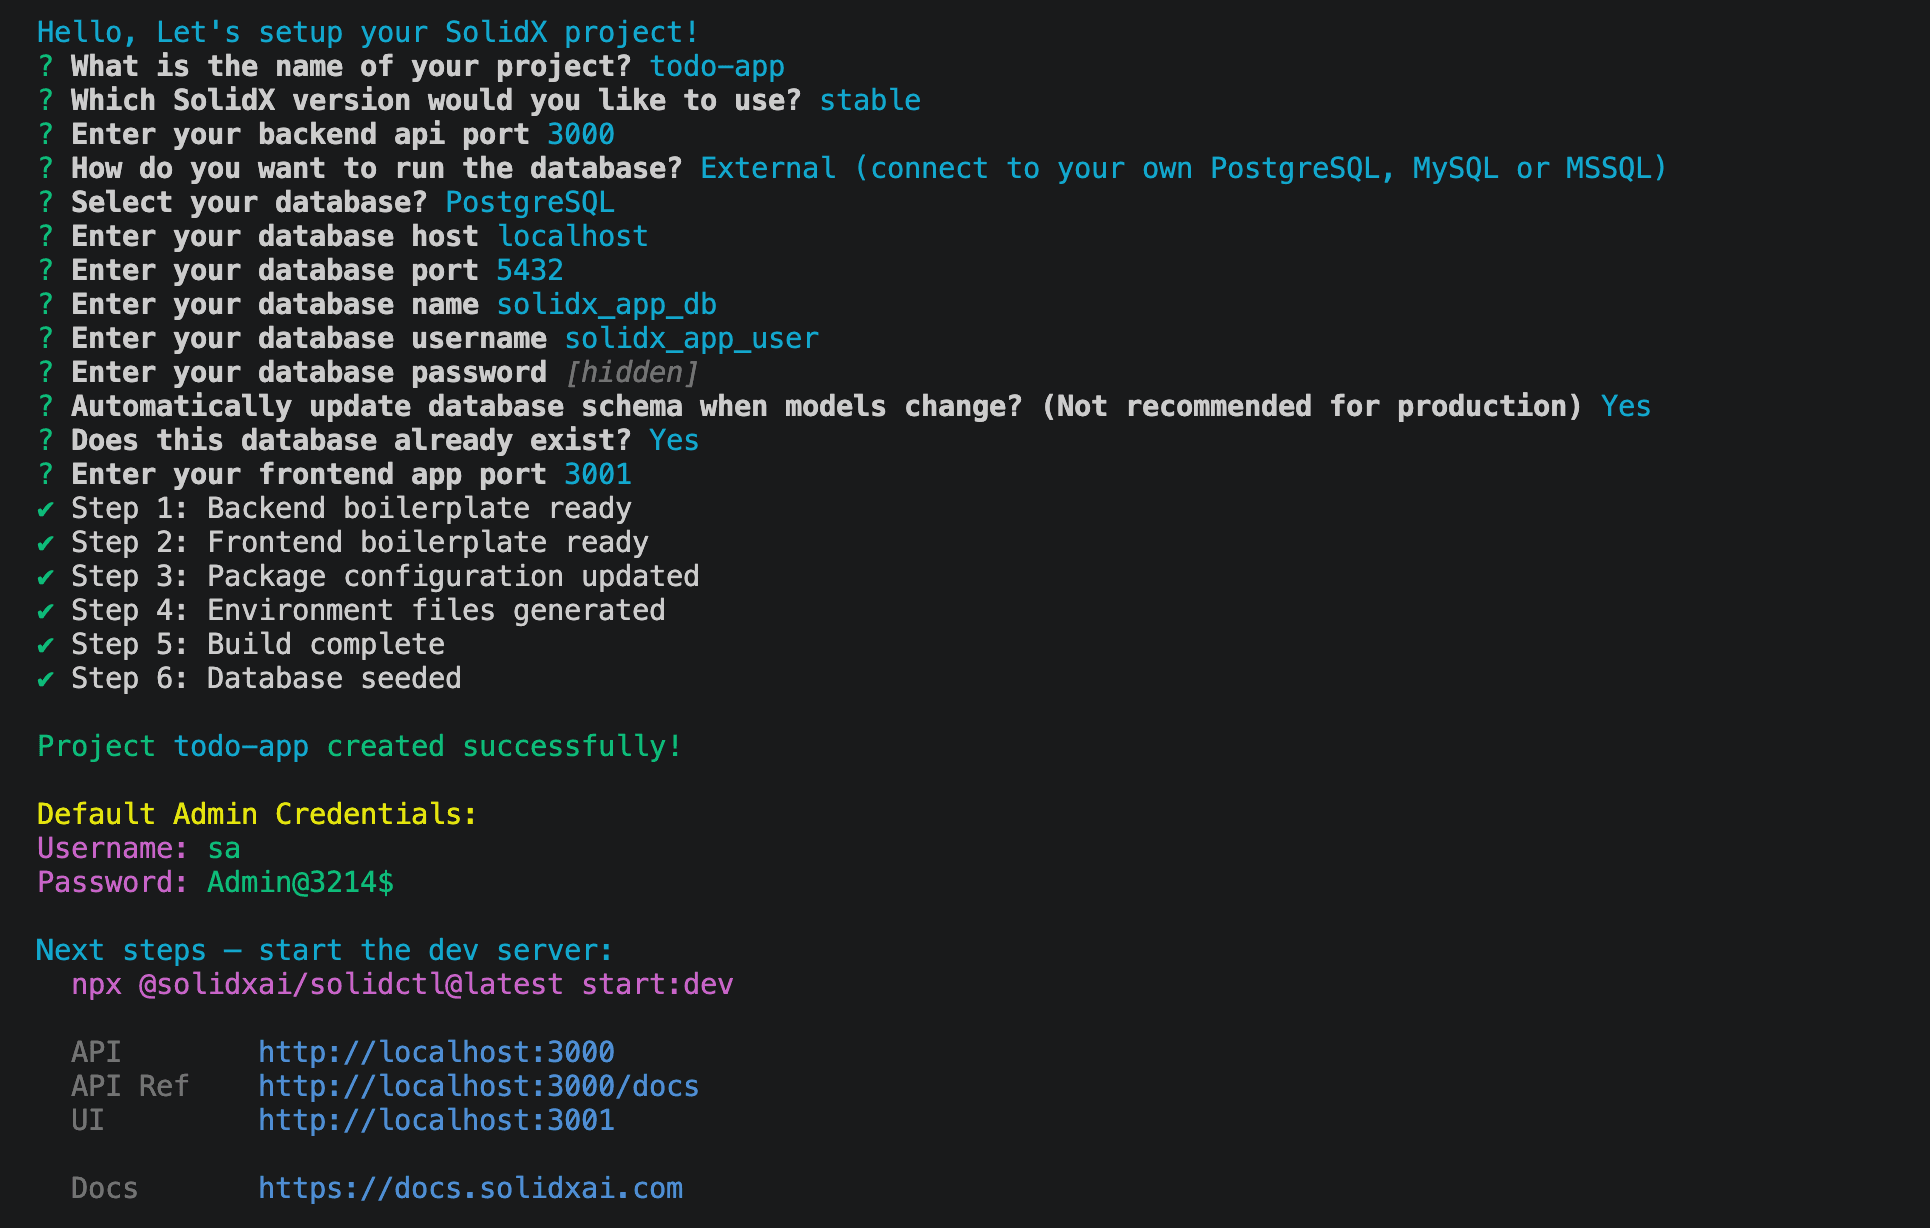
solidctl create-appWhen solidctl create-app asks for database credentials, use the same values from the Docker command above: host localhost, port 5432, database solidx_app_db, username solidx_app_user, and password strongpassword.
For the full scaffold, use these answers:
| Prompt | Value |
|---|---|
What is the name of your project? | todo-app |
Which SolidX version would you like to use? | stable |
Enter your backend api port | 3000 |
How do you want to run the database? | External (connect to your own PostgreSQL, MySQL or MSSQL) |
Select your database? | PostgreSQL |
Enter your database host | localhost |
Enter your database port | 5432 |
Enter your database name | solidx_app_db |
Enter your database username | solidx_app_user |
Enter your database password | strongpassword |
Automatically update database schema when models change? (Not recommended for production) | Yes |
Does this database already exist? | Yes |
Enter your frontend app port | 3001 |
The scaffold should finish by reporting that the backend and frontend boilerplate are ready, environment files were generated, the build completed, and the database was seeded.
Scaffold the project:
Connect Your AI Agent
From the generated todo-app project root, run:
cd todo-app
solidctl mcp install
This command finds supported AI clients on your machine and writes the SolidX MCP server entry into their configuration automatically.
Supported agents include:
- Claude Code
- Claude Desktop
- Cursor
- Codex
Run the MCP install before starting the app. The install step prepares your AI client configuration first; after one client restart, solidctl start:dev will bring up the API, admin UI, and MCP server together.
About the API key
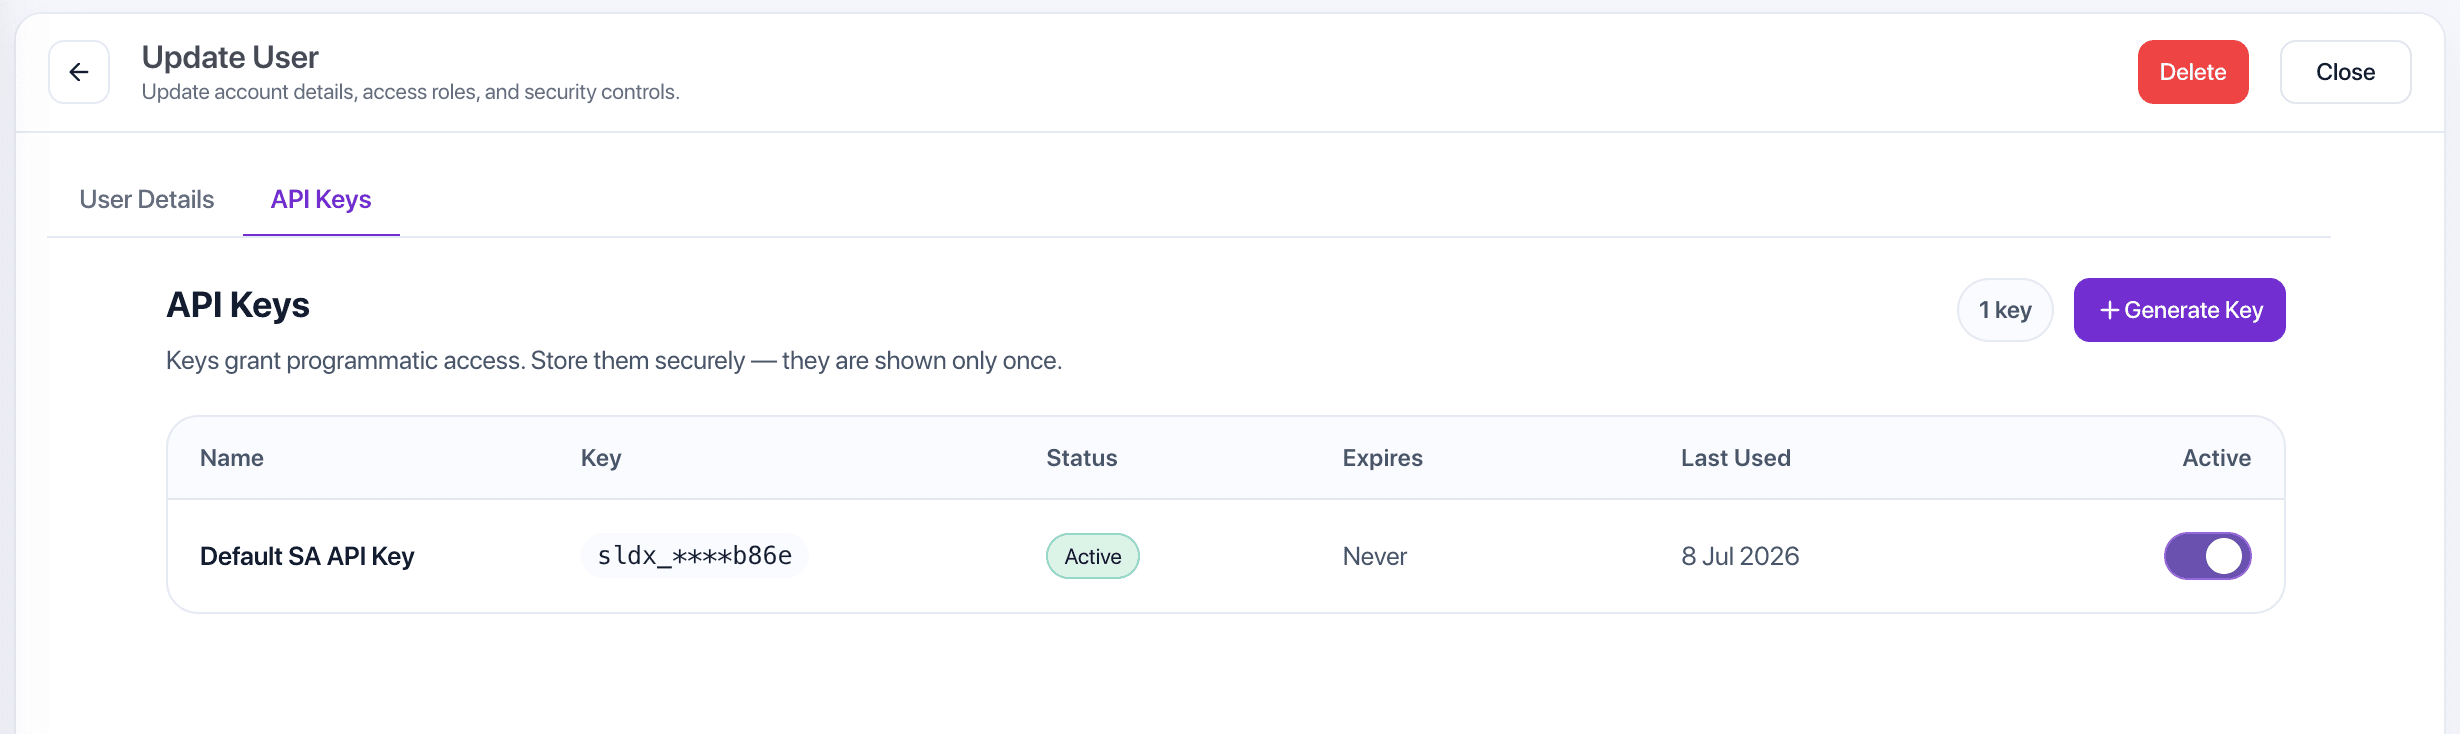
During scaffolding, SolidX writes an MCP config file under ~/.solidx/<project>/mcp.json. The install command reads the API key from that file, so you do not need to copy a key manually for the first setup.
If you later generate a new key from the admin UI, re-run the command with --api-key sldx_....
Restart your client
After the install completes, restart your AI client before continuing. Most MCP-capable clients load new server entries only when they launch.
Start the App
After the MCP entry is installed and your AI client has been restarted, start the project from the same todo-app root:
solidctl start:devThen sign in to http://localhost:3001 with:
- Username:
sa - Password:
Admin@3214$
Available endpoints:
- API:
http://localhost:3000 - Swagger:
http://localhost:3000/docs - Admin UI:
http://localhost:3001
Verify the MCP Connection
Open a new session in your restarted AI client. In that client's MCP-server or tools view, confirm that solidx-todo-app-mcp is connected and that SolidX tools are available.
Do not continue to the generation prompts until this connection is active. If the server is unavailable, review the SolidX MCP Server guide before proceeding.
After signing in, you can verify the API key that MCP uses. The default super admin user already has a generated key under the API Keys tab:
MCP runtime note
solidctl start:dev already starts the MCP server alongside the API and UI by default.
You only need solidctl mcp start separately if you intentionally launched just part of the stack, for example with solidctl start:dev --api or solidctl start:dev --ui.
In that reduced setup, start MCP manually:
solidctl mcp startReference:
Before moving on
Only continue after you confirm:
- the agent was restarted if needed
solidx-todo-app-mcpis connected and SolidX tools are available in your agent- the admin UI loads and you can sign in with the default super admin account